SWAT and Zombies: Home Front Normal and Hell Modes Strategy Guide
This game guide will focus first on conquering the Home Front stages of SWAT and Zombies defense game. It will also contain some useful intro tips for beginners to help them quickly understand the game mechanics while playing. Note that these are just suggestions and are not the only way to play the game. Your mission is simple. Prevent the hoards of Zombies from reaching Perfectville!
◄Back to SWAT and Zombies: FAQ, Tips, Tricks and Strategy Guides List
– Tips To Remember While Playing –
Notable SWAT Team Stats:
– Check the Attack Distance of your SWAT members to know where to place them. All must be doing their job when zombies are attacking, if a SWAT member can’t attack or reach a zombie, use the BACK option to relocate him or to recover Coins.
– High HP SWAT members should be placed into your front lines to absorb
damages.
– SWAT’s Coins Cost: You start a stage with a fixed number of Coins, and you
can get more free Coins by defeating zombies. For Cash users, you can buy more while defending. – It is recommended that you summon low cost SWAT members first before summoning the big guns.
Reloading SWAT Units:
– M.A.G Size 0 = Infinite, Doesn’t need to Reload. – M.A.G Size 1 = Needs to Reload every after use. – M.A.G Size X = Needs to Reload after a number of use. – It is easier to Reload all SWAT members by constantly using “Swipe” to all SWAT in-game, instead of using “Tap”. You’ll be able to monitor their current HP (Brown Bar above their heads) too while doing this.
The BACK Option:
– This is a very handy option that can help you with your strategies. – For withdrawing a low HP SWAT out of the battle to avoid getting casualties. – The BACK option will also recover Coins depending on the remaining HP of the SWAT. This is very useful for summoning a SWAT that you need into the battle. – If you are sure that a Row doesn’t have any enemies left (near end game), withdraw them all to focus on other rows.
Routine For Defending (Summary):
– Summon Low Cost SWAT members first like Pistols, Sticks, or Shields. – Earn Coins (dropped by Zombies) to summon other members that you need. – Use the Back Option when needed. – Try not to let any SWAT die or at least limit your casualties to 1 or 2 (for some stages) to get 3 Stars per Stage. – If you FAIL, do not use Stars!, save all your Stars for upgrades.
_________________________________________________________________
– Quick Walkthrough and Strategy Guide –
Upgrades Summary (See details below) – Pistol: 30 Stars Pistol Upgrade – Shield: 30 Stars Shield Upgrade
_________________________________________________________________
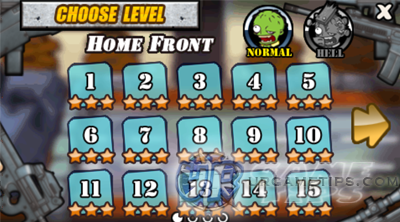
Normal Mode Stage [1] to [13]
– Just follow the sample formation below. The base formation is [Pistol] – [Stick]. 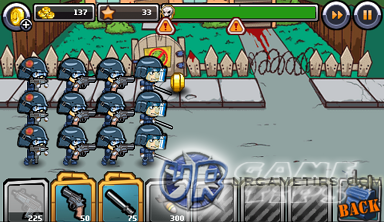 Normal Mode Stage [2] – After this stage, an upgrade tutorial will pop-up. Follow but choose “Upgrade” then “Close” to save those 5 Stars for better use.
Normal Mode Stage [11]
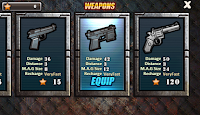 – You should have 30 Stars by now (3 Stars per Stage). Go to the Pistol Upgrade screen and purchase the 30 Stars worth Pistol upgrade. Don’t forget to select Equip after Buying it. – Add Bomb to your slots.
Normal Mode Stage [13]
– After defending this stage, Tap the (X) button at the upper right corner to choose a Mode. Go to Hell Mode to get Stars.
Hell Mode Stage [1] to [7]
– Formation Per Row: [Pistol] – [Pistol] – [Stick] should be fine. – After defending this stage, Go to the Shield Upgrade screen and purchase the 30 Stars worth Shield upgrade. Don’t forget to select Equip after Buying it. – Now go back to Normal Mode.
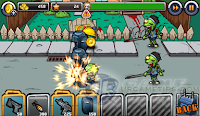
Normal Mode Stage [14] and [15]
– SWAT Members: Pistol, Shield and Bomb!
– Base Formation Per Row: [Pistol] – [None] – [Shield] or [Pistol] – [Pistol] until
you can place [Pistol] – [None] – [Shield] per row in the battle. 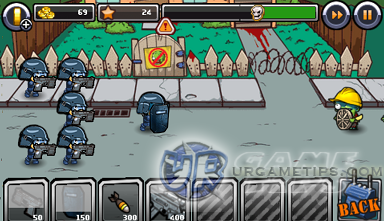 – If you have a row with [Pistol] – [Pistol] – [None] – [Shield] formation, withdraw the Pistol at the back to get the formation below. – If the Spear Zombie appears too early in the battle, use Bomb or just Pause the game then restart the stage. Zombies appears at random so if any powerful Zombies appears earlier than it should be (Exclamation Point/s at Time Line), restart the stage instead because it will be harder to defend!. You’ll notice this one after some repetitions.
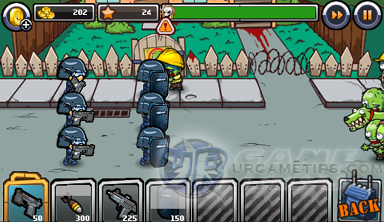
– Hold the above formation until the Spear Zombies appears. If they did, withdraw
your Pistols once they start to get damages. Summon them back again if the threat is clear, and if you have at least 350 Coins. Use your Bombs for Spear Zombies only.
 – You should have more than enough Coins for your Bombs. Use it to defeat those Spear Zombies, your Shield SWATs will handle the rest, they are tough anyway. – If you need more Coins, withdraw SWAT members that doesn’t have anything left to attack.
Hell Mode Stage [8] to [13]
– SWAT Members: Pistol, Stick, Shield and Bomb! – Base Formation Per Row: [Pistol] – [Pistol] – [Stick] – Quickly complete the formation below (left pic). If a Zombie Girl shows up, make sure that you have 2 SWATs attacking her. 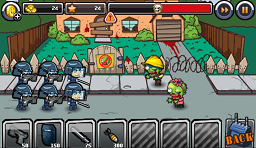
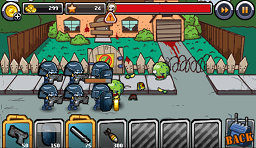 – Earn Coins then slowly summon Shields to your front lines. Wait for your Shield to at least reach the 3rd column (Stick) before withdrawing your Stick SWAT. Next, withdraw your Pistol at the back then put him right before your Shield to get the formation above (right pic). – Start using Bombs now.
Hell Mode Stage [14] and [15]
– It would be easier to complete these 2 stages once you unlock more powerful SWATs, better skip them for now, then go back later. – After unlocking the Mine (Back Street Stage 5), and upgrading your Bomb and Mine, return here. You should have unlocked your 5th SWAT slot also (10 Stars). – SWAT Members: Pistol, Stick, Shield, Bomb and Mine! – Same formation above. – Note: If those Spear Zombies appears too early, restart the stage. – Use your Mine to shatter zombie mobs in front of your Shield/Stick SWATs. This will give you a lot of Coins and will help your tanks from overwhelming zombies. If a row doesn’t have a lot of Zombies you can use your Mine to kill those Spear Zombies. Mine SWATs are vulnerable from attacks too, so be careful not to let them into heavy mobs. – Use your Bombs only for killing those Spear Zombies.
_________________________________________________________________
Back Street Normal Mode Stages:
– Go here: Back Street Normal Mode – Walkthrough and Strategy Guide
_________________________________________________________________
Related SWAT and Zombies Tips & Guides:
SWAT and Zombies: Back Street Normal Mode – Walkthrough and Strategy Guide
SWAT and Zombies: Back Street Hell Mode – Walkthrough and Strategy Guide
SWAT and Zombies: Mall Mart Normal and Hell Mode – Walkthrough and Strategy Guide or
– CLICK/TAP HERE TO BROWSE ALL SWAT AND ZOMBIES TIPS & GUIDES –